Encoding Magnetic Stripe With ID Card WorkshopMagnetic stripe is widely used to store data on plastic ID cards. It is developed by IBM in late 1960s. Although it is quite a old technology but it is widely used today because it is easy to use and easy to be encoded and the cost of reading and encoding instruments and the cost of supplies compare to other solutions is still very low. Today, many ID card printers have built-in magnetic stripe encoders. And these magnetic stripe encoders usually support ISO standard 7811. With ISO 7811, reading and encoding instruments can use a universal data format to access data on cards. With ID Card Workshop, you can easily encode magnetic stripe automatically while printing with your ID card printers (with magnetic stripe encoder on-board). Following is the instruction of how to configure and encode magnetic stripe with ID Card Workshop: 1. Enter 'Card Designer' window, select a project and click on 'Magnetic Stripe' button and a 'Magnetic Stripe Encoding' window will be appeared. 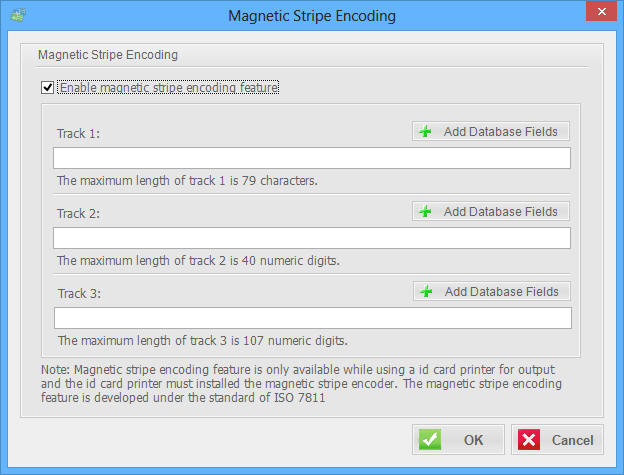 2. Check "Enable magnetic stripe encoding feature". Magnetic stripe contains three tracks, which: Track 1 can maximumly contains no more than 79 characters data. Track 2 can maximumly contains no more than 40 numeric data. Track 3 can maximumly contains no more than 107 numeric data. Enter data you would like to be encoded into magnetic stripe while it is being printed. You can also add variable data by clicking "Add Database Fields" to add data fields into content. While printing, A database field is a variable value. it will be changed from one printed piece to the next, and using text info from database. And then click 'OK' button to complete the configuration. 3. Enter printing feature, select "ID Card Printer Mode" . Select a ID card printer and paper size for output. you must select a ID card printer with magnetic encoder on-board, otherwise cards won't be encoded correctly. 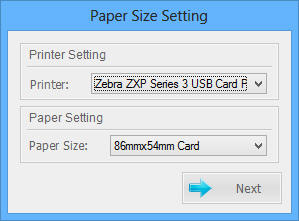 And click "Next" button. and a "Print" Window will be appeared. 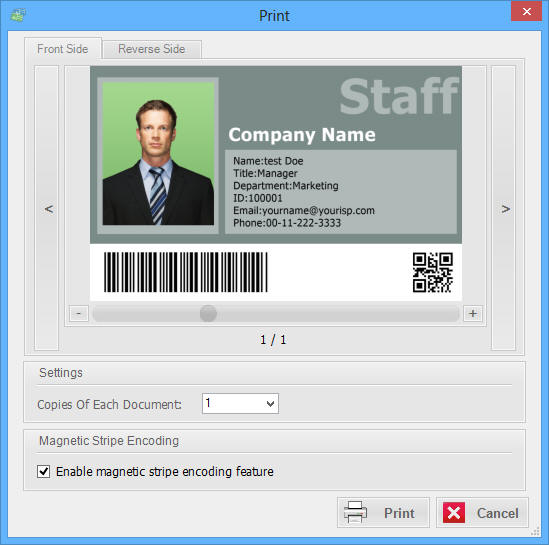 Make sure the "Enable magnetic stripe encoding feature" is checked, and click 'Print' button to output, and cards will be encoded properly in the printing procedure. | |||||